Wall Mixer Design Options
Bathroom fittings wall mixer – Wall mixers are a popular choice for bathroom faucets, offering a stylish and functional solution for controlling water flow. They are mounted on the wall, rather than the sink or countertop, providing a clean and streamlined appearance. Wall mixers come in a wide range of designs, materials, and finishes, allowing you to customize the look of your bathroom to suit your personal style.
Bathroom fittings wall mixer plays a vital role in enhancing the aesthetics and functionality of your bathroom. Its sleek design and advanced features can elevate the overall ambiance, creating a luxurious and modern appeal. Just like the modern kitchen interior designs that prioritize both style and efficiency, bathroom fittings wall mixers offer a harmonious blend of form and function, transforming your bathroom into a sanctuary of comfort and style.
When choosing a wall mixer, there are several factors to consider, including the type of mixer, the material it is made from, and the finish. The type of mixer will determine the number of handles and the way in which the water flow is controlled. The material will affect the durability and longevity of the mixer, while the finish will determine its appearance.
One way to improve your bathroom’s aesthetics is to install a bathroom fittings wall mixer. However, if you notice that your bathroom walls are sweating yellow, it’s important to investigate the cause. Why do my bathroom walls sweat yellow ?
There are a few possible explanations, including poor ventilation, excessive moisture, or a plumbing leak. Once you’ve identified the cause, you can take steps to resolve the issue and prevent further damage to your bathroom. Meanwhile, a bathroom fittings wall mixer can add a touch of style and functionality to your bathroom.
Types of Wall Mixers, Bathroom fittings wall mixer
- Single-handle mixers have one lever that controls both the water temperature and flow rate. They are easy to use and operate with one hand, making them a popular choice for busy bathrooms.
- Two-handle mixers have separate handles for controlling the hot and cold water. They offer more precise control over the water temperature, but they can be more difficult to operate than single-handle mixers.
- Thermostatic mixers have a built-in thermostat that maintains a constant water temperature. They are ideal for families with young children or for people who need to be able to control the water temperature precisely.
Materials Used in Wall Mixer Construction
- Brass is a durable and corrosion-resistant material that is commonly used in the construction of wall mixers. It is available in a variety of finishes, including chrome, brushed nickel, and oil-rubbed bronze.
- Stainless steel is another durable and corrosion-resistant material that is often used in the construction of wall mixers. It is available in a variety of finishes, including brushed stainless steel and polished stainless steel.
- Plastic is a lightweight and inexpensive material that is sometimes used in the construction of wall mixers. It is not as durable as brass or stainless steel, but it is available in a variety of colors and finishes.
Finishes and Styles of Wall Mixers
- Chrome is a classic finish that is easy to clean and maintain. It is a popular choice for modern and contemporary bathrooms.
- Brushed nickel is a warm and inviting finish that is becoming increasingly popular. It is a good choice for traditional and transitional bathrooms.
- Oil-rubbed bronze is a dark and rich finish that is perfect for rustic and industrial bathrooms.
Functionality and Features
Wall mixers are designed to provide convenience and control over water flow and temperature in bathrooms. They are typically installed on the wall above the sink or bathtub, with the spout projecting outwards. The operation of a wall mixer is straightforward:
- Temperature control: The mixer handle controls the temperature of the water by adjusting the mix of hot and cold water. Moving the handle towards the red or blue indicator increases the flow of hot or cold water, respectively.
- Water flow: The water flow is regulated by turning the handle clockwise or counterclockwise. Turning the handle further open increases the water flow rate.
- Spray patterns: Some wall mixers come with adjustable spray patterns, allowing users to customize the water stream. These patterns may include a standard stream, a wide spray, or a pulsating massage setting.
- Safety mechanisms: Wall mixers often incorporate safety features to prevent scalding or other accidents. These features may include thermostatic controls that limit the maximum water temperature, anti-scald devices that shut off the water flow if the temperature becomes too high, and flow restrictors that reduce the water flow rate.
The water flow rate and pressure capabilities of wall mixers vary depending on the model and manufacturer. However, most wall mixers are designed to provide a comfortable and efficient water flow for everyday use. The flow rate is typically measured in gallons per minute (GPM) or liters per minute (LPM), and the pressure is measured in pounds per square inch (PSI) or bars.
Installation and Maintenance: Bathroom Fittings Wall Mixer
Installing and maintaining a wall mixer is essential to ensure its longevity and proper functioning. Here’s a step-by-step guide and maintenance tips to help you keep your wall mixer in top condition.
Installation
Installing a wall mixer requires basic plumbing skills and tools. Here’s what you’ll need:
– Wall mixer
– Adjustable wrench
– Plumber’s tape
– Teflon tape
– Hacksaw
– Measuring tape
– Level
– Safety glasses
1. Turn off the water supply and drain any remaining water from the pipes.
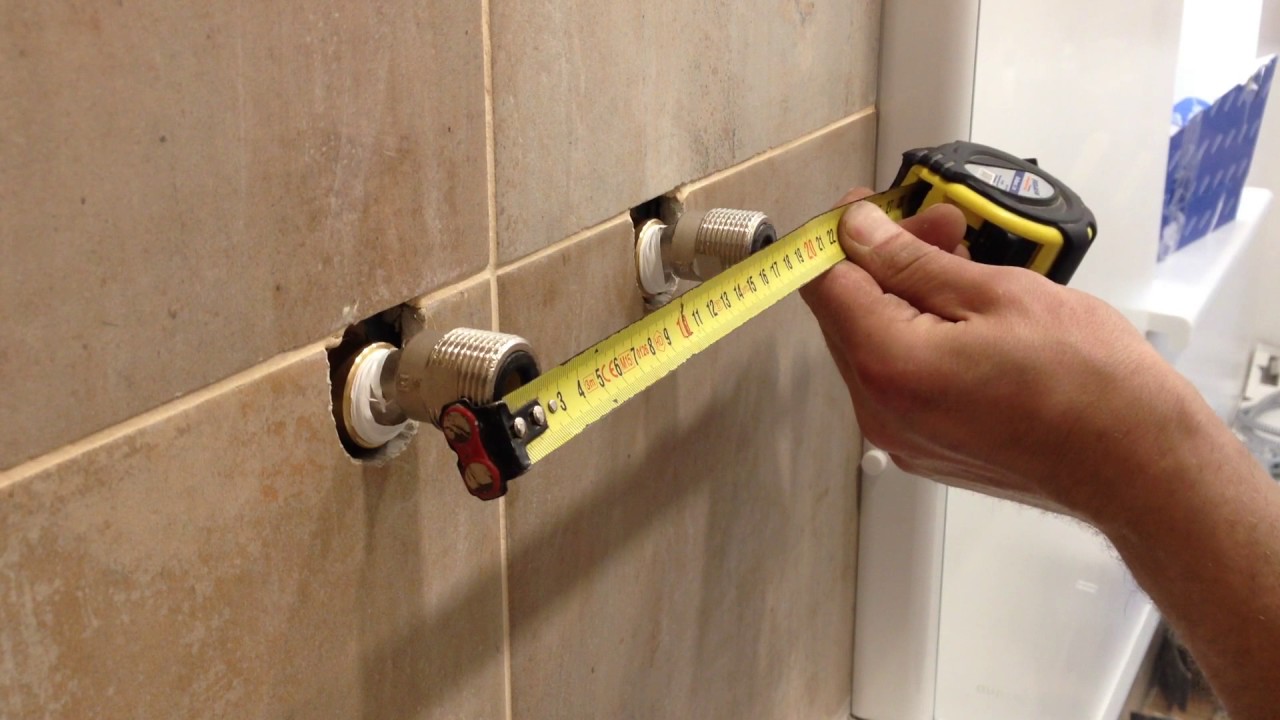
2. Measure and mark the desired location for the wall mixer. Ensure it’s level and aligns with the water supply lines.
3. Cut the water supply lines to the appropriate length using a hacksaw.
4. Apply plumber’s tape to the threads of the water supply lines and wall mixer.
5. Connect the water supply lines to the wall mixer and tighten using an adjustable wrench.
6. Apply Teflon tape to the threads of the wall mixer and insert it into the wall.
7. Secure the wall mixer in place by tightening the mounting screws.
8. Turn on the water supply and check for any leaks.
Maintenance
Regular maintenance is crucial to keep your wall mixer functioning smoothly. Here are some tips:
– Clean the wall mixer regularly using a mild detergent and a soft cloth. Avoid harsh chemicals or abrasive cleaners.
– Inspect the wall mixer periodically for any leaks or damage.
– If you notice any leaks, tighten the connections or replace the O-rings.
– If the wall mixer is not functioning properly, contact a qualified plumber for assistance.
